Sometimes it is necessary to enlarge an image but when you scale it up in size in Photoshop, Photoshop Elements, Illustrator, etc. it comes up blurry or pixelated. This tutorial is going to show you how to increase the size of your graphic without losing the quality. This works best when you know the exact or a pretty close approximate size you need your graphic to be.
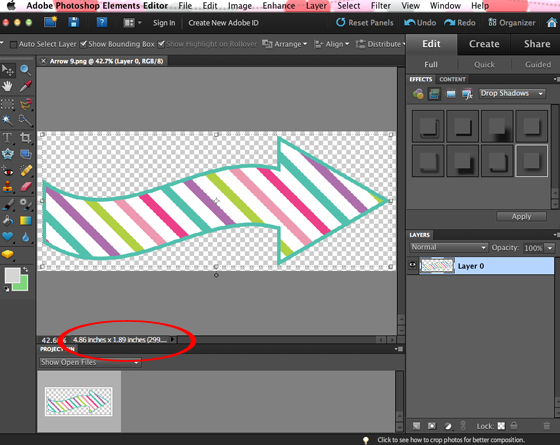
To start, open your clipart in Photoshop Elements. This will also work with Photoshop.
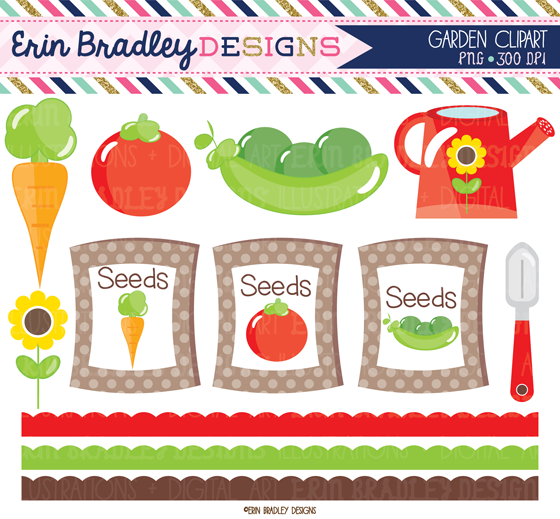
The starting size I'm working with is just about 4.89 inches wide by 1.89 inches tall at 300 dpi.
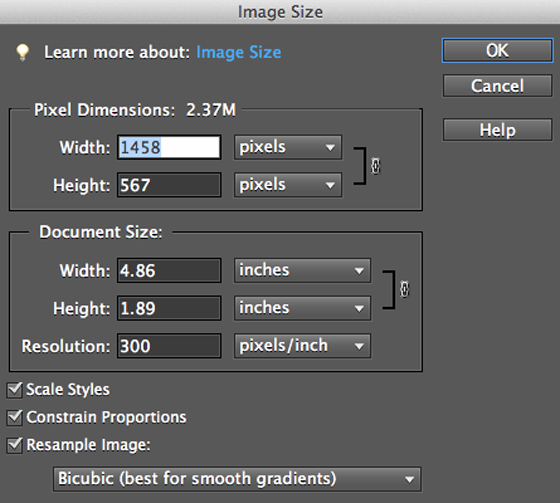
Now go to your toolbar and click on “Image”, "Resize" and then “Image Size”.
I decided I wanted to make my graphic 10” wide. In the box that pops up I typed in 10” for the width under "document size" and then clicked on the “constrain proportions” and “resample image".
On a side note, make sure your resolution stays at 300 dpi (or whatever you had it set to). I’ve noticed sometimes the graphic defaults to a lower resolution at this point. If this happens you can just change your resolution back.
You’ll see my pixel size has now increased along with the size in inches.
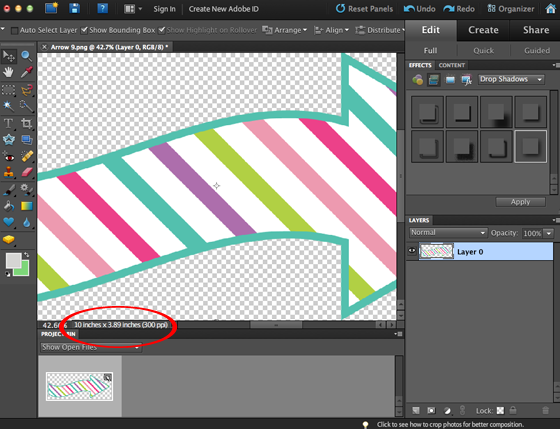
Once everything looked good I clicked on “OK” and as you can see the image is now much larger and the size at the bottom has changed to 10 inches by 3.89 inches.
Now…make sure you save a copy of this new graphic so you don’t override your original file. Once you have the file saved you can insert or place it into whatever document you are working with, print it up, etc.
This also would work if you want to decrease the size quickly & easily instead of manually scaling the graphic down in size in your document. You can just type whatever size is needed in the “document size” box. You could also just change the “pixel dimensions” if you know those (this is usually useful with web graphics).
If you only need to change the resolution of your file you can still go into image resize and instead of changing any of the dimensions, just change the resolution to your desired size.
One final thing to note - if you try to make the graphic much, much larger you may still run into issues with the image becoming pixilated or blurry. In those situations it may be best to reduce the resolution size so you can increase the image size even more.
![post signature]()